The Other Navy Outfit

10.14.2018

Well hello there everyone, guess who's been working a lot. Nope it's not Froggie. In fact he suddenly disappeared yesterday when I needed to hand sew two sets of shoulder pads in two dresses.  I don't keep you around just for your looks Frog!  You'd better get to covering a 3rd pair of pads while I finally write a blog post.  On a related note working on 3 garments simultaneously can be fun....except for that part where you have to cover and sew in 3 sets of shoulder pads in two days.  *And no, shoulder pads are not optional in my sewing room. No Saggy Shoulders!

I'd planned on getting my last summer garment posted in September, but pesky things like feeding my family, cleaning their clothing and sleeping took my available free time.  Desmond might have licked a few classmates and brought some germs home as well. (Confession - he probably didn't lick anyone. I'm sure the germs were spread in an equally gross manner.) However Fall weather didn't show up in PA until yesterday, so I'm not feeling too bad about a semi late Summery make.
This summer I managed two navy outfits to complement the growing collection of navy hats. After finishing up the Hollywood shirtdress it was time to get working on some separates. It was pretty egregious that the only solid colored skirts in my closet were black. (The devil on my shoulder screams "But Black Goes With Everything! So does red and pitchforks. Just go with me on that last one." OK, Ok dude, chill out. You don't have to sell me on pitchforks. They're awesome.) But sewing plain skirts is boring so I decided to make it a matching set with a bolero.  Mostly because I had Hollywood 1326 in my stash already and wanted to sew it More Than Anything!
AHHHHHH! It's so cute! I even want the outfits in the color combos/patterns on the envelope.  Shouldn't a pink and black polka dot silk be something you can go anywhere and buy? Why is it not? Who am I kidding, the jade/pink floral is the one I really want. Stupid past Heather for sewing up the stashed jade green cotton into a Beignet. To be honest I did like that Beignet a lot but it will never be worn now. Oh well, you must sew for the body and style you enjoy now or your child will throw all your fabric in a dumpster after you kick the bucket.  This has been your stashbusting message for the year.
So yeah I bought some navy linen to make this happen. (Stashbusting, what?) And got to work musling this one up.  Turns out that cute pointy waistband is not a waistband. It is a seperate belt that buttons on the side. It also turns out that it's not so cute if your bust line is so low that the points are poking you in the underboob.  One does not need their own waistband harassing them so that had to go.

It was nice to sew a slightly different skirt style than the plain 4 gore style that has been my go to. It's just as easy to put together and paired well with the medium weight linen I'd closen.  The linen also sewed up great in the bolero.  The little fold back collar just makes me squeal with delight! It would have been an easy sew as well if I hadn't complicated it by adding a lining.  However I've never said after the fact, "Oh God, why did I put this luxurious silk lining in my garment? I wish I was starting at bare cover stitched seams instead!"

This large scale ikat print had been sitting in my stash since Desmond was an adorable toddler. I've been a little concerned that it's too bold for any garment. But you know what I'm not concerned about being bold?  A lining.  What's that? Oh you're saying, "Umm Heather, you appear to be wearing a top out of this fabric?"  Yes, Yes I am.  Well after you finish you lining and have 1.5 yards left and have recently watched all of Ms. Masel then a matching bold top seems like a fine idea.  Due to yardage constraints I turned to an old pattern friend, Simplicity 1155 of the darted neckline.  Past Heather had even traced the short sleeve pattern back in 2017.
Once again you can barely see the the decorative neckline darts. One day I'll feel like torturing myself by sewing it in a solid. Until then you'll just have to enjoy the glorious button back.
One final thing, the sleeves on this are kind of odd, but odd in a way that I enjoy. The first thing that popped in my head is that they are vaguely Romulan. A google search tells me that I'm incorrect, but I think we both understand the importance of a strong shoulder.
Pssss Taris, what kind of sleeve heads/pads/scaffolding you have in that thing? I need to know.

Pattern
Hollywood 1326 - Bolero and Skirt. (Pictured Above)
Simplicity 1155 - Button back blouse.

Fabrics used
Linen from Sawyer Brook for the main part of the bolero and skirt.  Stashed Silk crepe de chine for the bolero lining and blouse.

Pattern changes/alterations
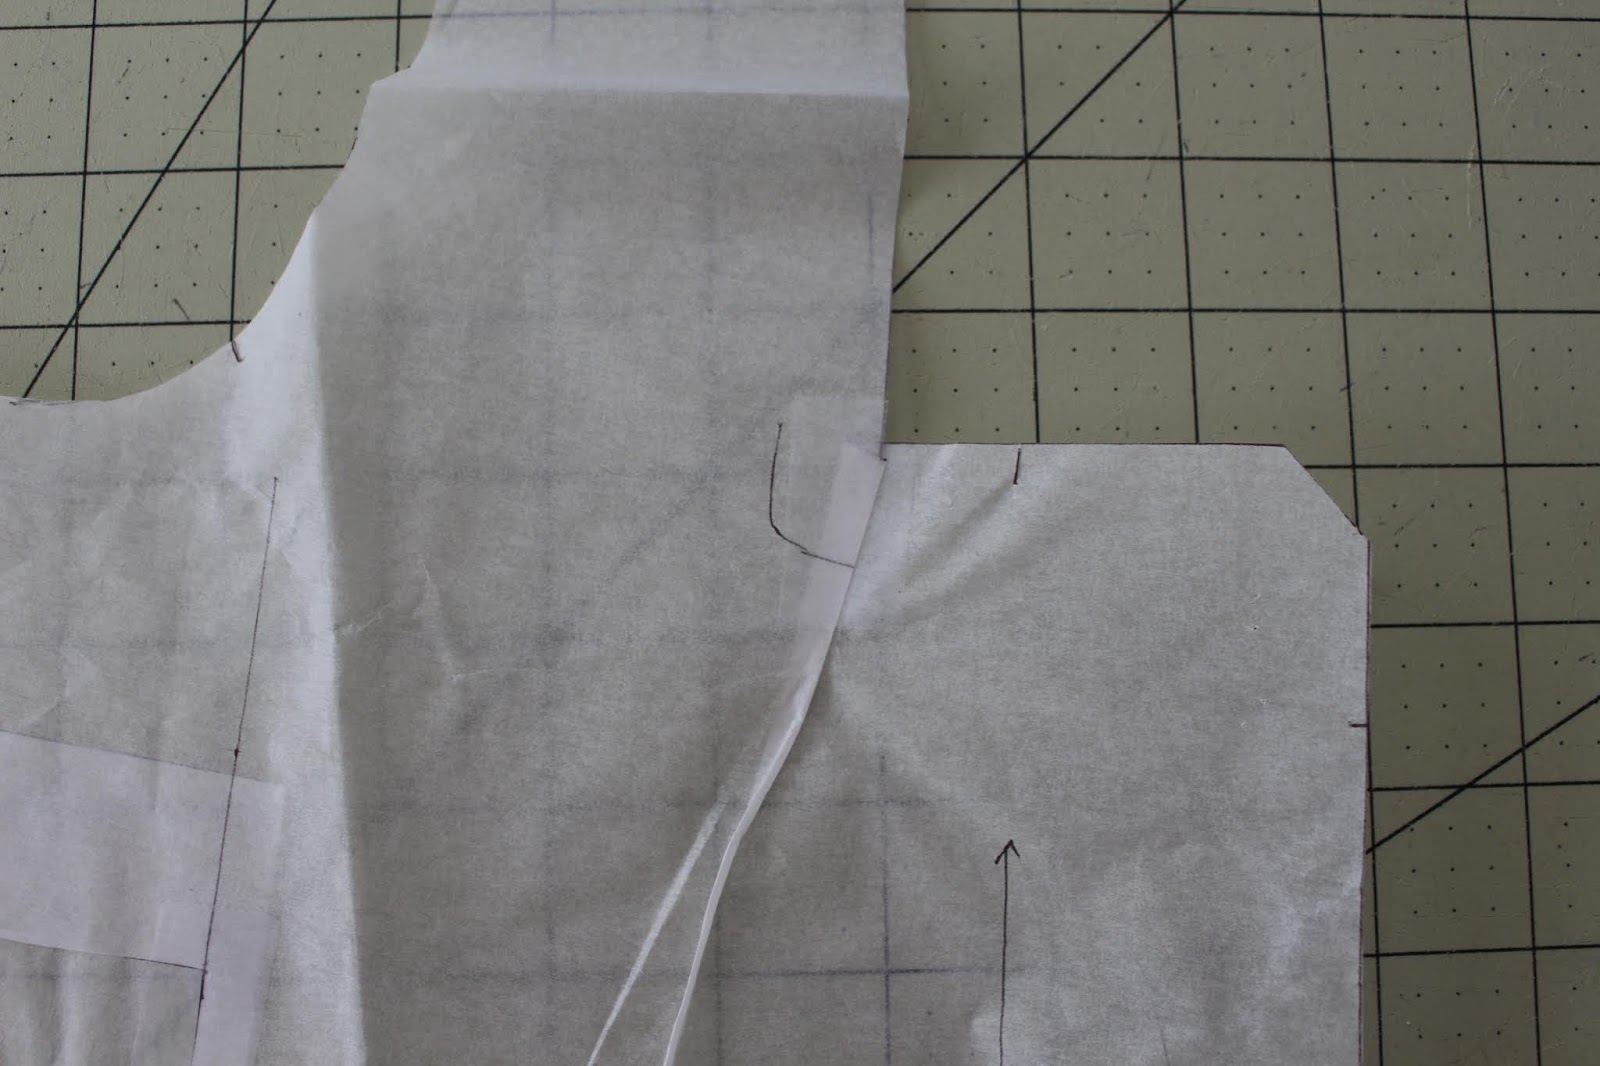
1. Standard 1/2" forward shoulder adjustment to the shoulder and sleeve cap
2. Added 1/2" extra ease to the hip of skirt. - This style seemed a bit narrow in that location.

Confessions/Advice
I don't remember much of anything because this was finished about 3 months ago. That means I didn't do anything real stupid or stab myself.

Husband Comment
"Ooooo, I like that the lining is the same as the shirt. What is that paisley? Seems Eastery."

Bonus Son comment - "In case you don't know, that brooch is a pear."

My Final Thoughts
This is the button back blouse that launched a bevy of button back blouses in my sewing room so brace yourselves for that.  I'm also pro bolero now. Next summer I'll probably revert back to type and sew a black one cause Black Goes With Everything!  *Cue devilish cackle.*

*I've been in 40's clothing land so long that double shoulder pads is starting to look good.

Failures

8.29.2018

Preface - If you follow me on Instagram you might want to skip this blog post. You've already heard my mini sob story. Enjoy your favorite tasty treat and join me back next time for a fun FO post. Mmmmm chooooocolate.

Most of the stuff I post on the blog are successes. This is because I'm super anal retentive about muslins, have been sewing for decades and am a pretty good judge of what works with my particular set of fitting issues. But this month I took a gamble on a pattern and lost in a major way.

Here's the "offender" right here, Vogue 5290. 
Looking at the fashion illustration again I still know why I bought it. The ladies look so pretty in their world with no gravity. Also I want a matching turban hat for something in the near future. And gloves, lots of gloves.  Have you all figured out that I'm an accessory junkie yet?   OK, let's move on.   When buying this design I knew that the bottom half was a gamble.  I'm a 40 year old woman with a nice c-section fat shelf and a big ass. I probably need hip/admondon gathers like a fish needs a bicycle. But this puppy was $12 bucks and I thought, "Let's roll the dice baby!!!! We can always sew it in a big print!"

It wasn't until the hard copy was in my hands that I realized the design also has gathers in the side seam of the waist. Oh crap, that usually doesn't work with my short torso/low bust combo.  I don't have enough waist to gather material up on!  Despite the number of red flags waving I decided to continue to roll the dice.  Vegas baby, Vegas!

So yes I did spend my Sunday grading this pattern up to my size. Then all of my free Monday sewing up a muslin to find *Insert Drum Roll Here*  It was a GIANT HOT MESS!

Oh you lost big time baby.

Issue 1 - Side seam ruching still a terrible idea on me.  It doesn't even read as ruching because pretty much everyone told me the torso was too long.  Yeah it kind of is because the ruching doesn't say in the waist area.  I could take the ruching out but then I need to add bust darts and ain't nobody got time for that.

Issue 2 -  V shaped abdomen yoke just as bad as it could possibly be on a mature figure. Just say no to "Lady Grotto" ruffles from now on Heather.  You live in a world with gravity and cake.

Issue 3 - The top half of the bodice feels terrible.  Several of my Instagram followers suggested swapping in a different skirt because they thought the bodice was pretty.  I can tell you that it just looks pretty compared to the dumpster on fire that is the bottom half.  The armholes are way too small, the yoke band doesn't sit on my body right and the shoulders jut out at a weird angle.  I've graded up enough patterns at this point that I'm fairly sure that wasn't the problem.  My gut feeling is that this design was made for a very different shaped figure than mine.

So that's the story in a nutshell.  It could have been worse, I could have wasted good fabric on this pattern and thrown it directly in the trash can. At least with muslin you can make a sad horn sound and move on with your life.  To rebound from this I'm sewing another version of Hollywood 1413 with 3/4 length sleeve.....in velvet.  HAA HAA I'm a Mad Woman!  So look forward to a post that's 80% me bitching about hand basting velvet and tasting velvet fluff in my mouth. It's gonna be fun.


Sewing to Match your Accessories - Hollywood 1064

8.12.2018

Early this summer I looked in my closet and realized a few things.  A - I have a lot of navy hats and shoes.  B - I have no navy clothing to wear with said hats and shoes.  C -Then I looked through my stash and found no navy fabric to sew up matching clothing.  Which then begs the question why do I have so many navy hats and shoes?   Hmmmmm, a real chicken/egg scenario there and not all related my paypal history. Maybe Froggie is buying them while I sleep.  (Froggie says, no. He only buys green hats and hides them in the closet so he can sleep in them later.) Oh well, guess we'll never get down to the answer of "why so many navy accessories." In fact it's really just a fabric buying opportunity in disguise! Guess I "have" to go buy that navy cold rayon on Etsy now. And so I did.
Cold Rayon could alternatively be called "The fabric that makes everything else feel like shit." You know, if you're not into the whole brevity thing. One touch and I thought about throwing out all the rayon challis in my stash. This won't happen because I'm a hoarder from a long line of even bigger hoarders. However cold rayon is now the queen of my stash and rayon challis is it's lowly peasant. 
Queen cold rayon told me right away that it was supposed to be a 40's style shirt dress, so I got to work finding a pattern that was pretty close to the Trashy Diva Sweetie cut.  That wasn't too hard since that particular style is pretty faithful to what real 40's shirt dresses looked like.  I settled on Hollywood 1064 because it had gathered yokes, a shirt collar, 3 button front and was available in my size.

To make a version a little more like the TD dress, I drafted some square pockets so that buttons could be placed on them. The front waistline was also tweaked a bit by changing the waist ease from gathers into tucks. Finally I shortened the sleeve a bit and left off the cuff.
My original intention was to keep this dress as neutral as possible, but it seems that I can't resist adding pops of bright color. Hand to god there were navy button/buckles in my cart but somehow these green ones showed up at my house. I couldn't let them go to waste.  Oh and they needed matching green top-stitching. Or maybe queen cold rayon decided that.  Probably the only reason I persevered contrast stitching patch pockets on rayon. (Don't do this to yourself....ever.)
Other than that pesky pocket top stitching this dress came together without any problems.  Queen cold rayon was right, it was meant to be a shirt dress.

Pattern
Hollywood 1064 with a few minor design changes.

Fabrics used
Vintage cold rayon I purchased from Etsy.

Pattern changes/alterations
1. 1/2" forward shoulder adjustment to both shoulder and sleeve cap.
2. 1/2" extra ease added to waist and hip.
3. Reduced sleeve cap height by 1/2".
4. Changed front waist from gather to 2 tucks.
5. Drafted 3.75" x 4" pockets for front.
6. Shortened sleeve by an 1".

Confessions/Advice
Confession - I did decide to switch the top stitching to green halfway through this process and had to do it on a partially assembled garment. Haa haa! I make everything harder for myself!


Husband Comment
"Looks like something that would be good to wear in the rain."  - referring to the print that he feels looks like rain drops. I think it looks like leopard print. :)

Bonus son comment - "I love it.  But in Minecraft that blue dress would be diamond armor. Unless you enchant it because then it will be purple." - maybe I should call this the Minecraft minute.

My Final Thoughts
So I which organs do I need to sell to get more cold rayon?  I was saving them for retired LEGO sets but fabric might be more important.  Look how happy I am wearing it!
Also my navy shoes and at least one of my navy trimmed hats is now on the blog. Success! Only 4 more navy hats to make assembles for. I'm sure that will only take another month or.....OH MY GOD IS THAT RED FABRIC!   Never mind, it's going to take forever.

We get it, you like lemons - Butterick 6556

7.22.2018

Honestly, is there a lemon print I've ever said no to?  Are lemons the new bird?  Just put a lemon on it?  Putting a lemon on it would actually work for me. "Look Steve! I bought a new power drill because it has lemons on it! I know we had a black one already but that's just boring." But enough about my weakness for good marketing, let's talk about lemon print dresses instead.

This is the third lemon print dress I've blogged about here hence the amusing, maybe only to me, post title. I imagine you all murmuring it when opening your blog readers. Listen guys, all the lemon dresses have different colored backgrounds, which is what a girl needs in her closet.  I don't have a problem, I can stop whenever I want.......*Looks up lemon prints in Spoonflower*
This time I used a pattern currently in print, instead of a hard to trace vintage one. You're welcome? May I present to  you my version of Butterick 6556, aka one of Gertie's new designs in the Spring catalog. This design caught my eye right away, especially the neckline. You guys know I like flashing my collar bones all over town.  Even though my sewing is mostly 40's era garments now, I just couldn't resist. As soon as Butterick had one of their regular sales this pattern joined my collection.
I'd bought this stretch cotton sateen home from work last summer and didn't get around to sewing it.  A fabric has to mature to reach its full potential....or something like that.  In truth the sateen weight was a little heavier than I usually buy and didn't fit any of the projects I wanted to work on at the time. However it was the perfect match for the structured bodice and pleated skirt of B6556.

The dress is drafted to have a full bodice lining, but I decided to leave that out due to the thickness of the self fabric.  Instead I used the neckline interfacing pieces as facings and hand stitched them down so that they don't flap out.  The added facings do make the top of the lapped zipper insertion look messy on the inside.  You have to kind of fold one side under so there isn't a raw zipper tape sticking up out of the neckline.  If I'd switched out the lapped zipper for an invisible one then the inside guts would have been a lot cleaner.  For some reason that day I'd decided that we had to do a lapped zipper, even though I hate them. Who knows what that's all about.
Construction wise I found this one extremely easy. Sew some darts, pleat the skirt, do some hems. Heck I didn't even have to hand hem the skirt on this one. Simple rolled hem on the machine and you're done.  I did have to do an "on the fly" waist alteration thanks to the spandex in the sateen making that area too roomy. The side seams were taken in an additional 1/2" and I made the side seam pleats deeper to match the bodice.  Going down a size in the waist probably would have been smart to do in the first place knowing I was using a stretch woven. That's OK though, it worked out in the end.

Pattern
Butterick 6556

Fabrics used
Stretch cotton sateen from Emma One Sock. (We happen to have this in stock still.)

Pattern changes/alterations
1. Blended sizes 14-16.
2. 1/2" Forward shoulder adjustment to shoulder seam and sleeve cap.
3. Dropped bust dart 1" and shorted waist dart the same amount.
4. Sway back adjustment of 1/2"
5. Removed 1/2" from the neckline. - See below for more info on that.
6. Removed 1" of ease at waist due to stretch woven. (1/2" at each side seam)
7. Added 1" of length to the hem.

Confessions/Advice
Confessions - Hmmmm, I've already confessed about my messy zipper insides and that's about the only naughty sewing issue that happened when making this dress.

Advice - I nailed the square neckline fit on this dress by some "just winging it" pattern fitting. To remove the extra width I didn't need a small fold was made in the corner of the neckline and I taped it closed. Figured it wasn't much different than doing a sway back adjustment. 
A poster in one of the Gertie FB groups told me that I should have slashed into the neckline and rotated that width into the bust dart.  That does make sense, but also this worked and was less work? I probably should try the other method on a similar style if only to compare.

Husband Comment
*Started singing U2's song "Lemon."  Declined to comment further as he was sure he already talked about this dress. *

Bonus Son comment - "I think it's cute. I love it and I love lemons." - The brainwashing has been successful!!!

My Final Thoughts
This was a fun, easy project for the start of spring. It fits nicely and gives me plenty of room for moving around. The only reason I'm not wearing it more right now is because it's been crazy hot. This weight of sateen will be nicer when we transition into Fall and have some cooler temps. And last but not least, when people say, "Nice Dress" you can say, "Thanks it has pockets."

2017 Flashback - Addicted to Plaid

6.17.2018

Well lookie here, my camera card still has more unblogged garments on it. There's also 3 different garments that haven't been photographed at all, but now I'm playing chicken with the summer sun. If I could take blog photos successfully in the rain I'd do it. Gotta keep that wet set from falling out before wash day. Momma don't have 2 hours to do that more than once a week.

Anyway I'm going to finally talk about one of my favorite makes of last year that somehow I've mostly kept under wraps until now.  This dress is the complete opposite of the poor Dragnor that didn't really work out.  Several of you mentioned in the comments of that blog post that I look best with high contrast colors and here's proof of that.  The pictures for this dress were taken the same day as the Dragnor pics. All I did was change my hair style and a few accessories.
The pattern here is Hollywood 1857, (pictured below).  I bought it in a lot of 4 patterns and thought this one contained both a romper and shirtdress. When it arrived it turned out to be a romper with an additional skirt you could put over the romper. Oops, probably should have read some of the seller's description about the product.  Sometimes I get excited and bid based solely on the pattern illustration and bust size.
I'm not anti romper on other people, but my romping days are done......if they ever existed. I'll keep my utilitarian english/german/irish/* insert other pale european based people here* legs covered thank you very much.  But about that shirt dress now, couldn't one create one with some minor pattern hacking?  Time to get out the tissue and make it work. Spoiler, hardly any work was required.

The original pattern drafter put the princess line seams in exactly the same location on the romper and the skirt. They also marked the natural waistline on the romper and drafted the skirt to sit there. All I had to do was draw a line across the waist of the various romper pieces and add seam allowance. Didn't have to do anything to the skirt other than omit the waistband. How easy is that!  Thank you past pattern drafter, you did fine work.
Since that part was easy I decided to complicate matters and make this design up in plaid.  Congrats Heather, you now have to match plaids across princess line seams and a waist seam. Oh and you picked a plaid that's not symmetrical.  I'm sure that won't come back and bite you in the ass.  Spoiler, it did.
Decision 1 - Where did I want the bright red plaid to go?  In the lower corner or the upper corner? (Went with lower corner as you can see.)

Decision 2 - Was I going to mirror the plaid across the front seam? I probably would have if the back had a center seam. Since it didn't all the plaid was cut in the same direction.

Decision 3 - How much of an adult beverage should you drink before cutting plaids?  Just kidding, though I wish that alcohol could be blamed for my cutting screw up.

Somewhere during the cutting marathon I flipped the direction of the fabric and cut several pieces with the red plaid block in the upper corner.  (Probably during a snack break......hey it takes a long time to match plaid across 8 pieces.) The mistake was caught before I'd finished cutting everything but there wasn't enough fabric to fix it.  I emailed Linda in a panic and asked if we still had any of this fabric at work cause I'd made a garment ending boo boo. She emailed back that someone had placed an order for this fabric over the weekend but she thought there was a yard left. The sewing goddess was with me because there was 1.5 yards after cutting that order. It was just enough fabric to cut new pieces with the correct plaid match and the garment was saved! Thank god, how else would I have gotten my "blue steel" on otherwise.


Pattern
Hollywood 1857 - slightly modified into a shirtdress.

Fabrics used
Dress weight cotton plaid from Emmaonesock (Sorry it's long gone.)

Pattern changes/alterations
1. 1/2" Forward shoulder adjustment.
2. 1/4" Sway back adjustment.
3. 1/2" Extra ease added to waist and hips.
4. Waist seam added to create shirt dress.
5. Button placement slightly changed.

Confessions/Advice
Confessions
 - I have fitting problems with square necklines that don't happen with other neckline shapes. Pretty sure it has to do with my hollow chest and low bust point. The annoying part is one fix doesn't seem to work on every square neckline.  On this dress it's a little too wide in the middle portion and will collapse in on itself.  One of these days I'll unpick my sewn down facings and take in the princess line seam above the bust. Until then I'm just going to wear it as is and be slightly irked about the neckline.

- Is sewing plaid addictive and do I have a problem? All signs point to yes.


Husband Comment
"It's plaid and similar to other things you wear."- the most Pennsylvania Dutch comment to date
Bonus son comment - "I would never wear plaid but you look good in it."

My Final Thoughts
I should fix the neckline fitting issue and make more of these. You can fit a whole smart phone/ipod/tape measure in those pockets. All at once! Also where can I get more summery plaids? Feed my addiction people. A girl has needs.   On that note I'll leave you with this picture of me being weird.  Why am I doing this? No idea. Feel free to speculate.

Hollywood 1413 - The Easter Outfit That Wasn't

6.03.2018

Hello everyone, happy summer 2018 to you heat loving people out there. You all are currently flooding my instagram feed with giant smiles on your faces as you gleefully break out your sandals. "Finally it's warm and I can ditch this sweater" you exclaim! I'm glad you are enjoying yourself, heck I can semi empathise having grown up with a beach loving father and sister and a weather neutral mother.  They never thought the summer sun was a hateful orb sucking up all their life essence while simultaneously stabbing them in the eyes. Only I would be huddled under an umbrella hissing with distaste while successfully trying to read in the eye searing glare.  Yes my friends, in my immediate family I'm the sole possessor of the nordic and/or vampire genes of my ancestors.

If you're a long time reader of the blog this is no surprise. I've been bitching about summer for probably as long as I've been blogging and will continue to do so. However I will admit to liking two things about summer. One - fancy summer shoes and Two - wearing rayon dresses. My closet is full of rayon dresses, but there's always room for more. Which brings us to some sewing actually done in 2018......gasp! So let's talk about Hollywood 1413, aka the Easter outfit that never was.
Here in southern Pa you have a 50/50 chance that Easter Sunday is going to be either 55 degrees or 85 degrees. There is no inbetween. In 2017 it was 85 degrees and my version of Hollywood 1025 was not heat appropriate.  I wore it anyway because by god my sewing plans were not going to be ruined by a freak heat wave. However the memory of unwanted sweating did trigger me to choose a flirty short sleeve dress pattern for Easter 2018.  It would look lovely paired with some stashed rayon from Gertie's JoAnn's line from the year before.  See, a match made in heaven.
Hollywood 1413 is full of 40's design detail goodness.  The bodice features a ruched center that is created by putting a seam along the neckline that extends down toward the bust.  This makes it possible for center of the bodice pattern to be extended/more ease added. This extra ease is then gathered back into the seam area and sewn in place.  A jaunty little self fabric bow completes the neckline area.

The skirt features 3 tucks that radiate out of the left hip and a sewn in cascade. The front skirt is pieced at the left hip to give you a seam for the cascade. Finally a bow belt balances out the bow on the opposite side of the bodice.
The back is pretty plain Jane with standard darts and no design details. Not that I'm complaining..... there were plenty of new techniques and hand sewing in this design already.


The sewing goddess has been very generous with larger sized 40's styles this year and this pattern happened to be my bust size of 36 inches.  Would I have purchased this in a 32" bust and graded it up?  Probably not.  That ruched bodice detail might have discouraged me from trying. As it was the pattern only needed minimal grading through the waist and hip to fit.  Used my cheater method of slapping .5" on the side seams and called it good. 

I did reference the instructions a few times since the drafting for the bodice ruching was totally new to me. All the neckline edges are faced which means there is a set order of sewing that needs to happen or you'll bungle the whole thing up.  Good news is that the original pattern drafter did do an excellent job giving you reference/placement points. There are various sized circles in the neckline area to help you line everything up.  After reading the sewing steps twice I was able to see what needed to be done and use these marks to assemble the neckline properly. 

The skirt was a bit easier since sewing tucks is pretty much the same on any part of a garment. The cascade was a no brainer, just hand hem and insert into the seam.  I only wish my nails looked as good as the illustrations while doing a rolled hem.
Hollywood 1413 was finished in plenty of time for Easter 2018, a whole month ahead of schedule! It didn't matter though because Easter wasn't 85 degrees this year.  Instead we came down on the 55 degree side of the coin. Obviously Mother Nature is trying to neg me by looking at my sewing plans and making the weather the opposite of whatever's coming out of the sewing machine.  Oh well, as you all may remember I put on Hollywood 989 and saved this dress for hot weather.  Now we'll be best buddies until the blessed Fall breezes arrive.

Pattern
Hollywood 1413 (pictures above)

Fabrics used
Rayon from Gertie's JoAnn's line in 2016.

Pattern changes/alterations
1. 1/2" forward shoulder adjustment to both shoulder and sleeve cap.
2. 1/2" extra ease added to waist and hip.
3. Dropped the bust dart 1.5" and waist dart point the same amount.
4. Added a .5" of length to the bodice.
5. Made .25" sway back adjustment.

Confessions/Advice
Not too much to add here for this pattern.  Will note that I spray starched the rayon fabric before cutting to make it less slippery. Then all the pattern pieces were carefully cut out on a single layer, keeping the selvedges parallel with my cutting board. This method worked with with this rayon which was on the less slippery side of the spectrum.

Husband Comment
"The swirly pattern on the fabric works well with the loose fit." - I think loose fit actually means the design elements. If that's the case he might be learning something about sewing after hearing me natter on about it for 13 years.


My Final Thoughts
This pattern perfectly scratched my intermediate sewing skills itch of wanting a bit of a challenge.  It was neither too easy or too hard, but jusssst right. 

2017 Flashback - Suit Jackets Galore Part 1

5.13.2018

Confession - I have always loved suits.  Back in high school I had a black pinstriped pantsuit with a double breasted jacket that was my pride and joy.  It was a cheap ass polyester blend purchased at *Fashion Bug but I felt like a million bucks in it.  One year I wore it to school with on Halloween with heels and told people I was a lady mobster.  No one was charmed by my "creativity" or fashion sense. However this was one of two instances that my highly insecure self said...not outloud but internally.... "Fuck you guys, I look good in this suit." (The other time was when a boy I'd known for years  disparagingly said I was the only girl he knew that had sideburns. That time I internally said, "Fuck you I have great hair.)
All of this is a roundabout way of saying that in the summer of 2017 I blocked out about a month and a half to make a couple of suit jackets.  During the previous winter I'd been constantly annoyed about not having enough dressy options that worked with the weather. I didn't sew anything then for some reason, probably distracted by cake.  Instead I just bought several new pieces of wool while cackling with glee. Oh wool, you complete me. Let's go get brunch. Honestly though, who wouldn't fall in love with this plaid? Only a monster.....or maybe someone who looks terrible in green. I'll cut you a little slack if that's the case.
You guys know how I feel about plaid, we're soul mates. Also it's super hard to even find a predominately green plaid. As soon as I saw this on the Mood website I was practically screaming, "TAKE MY MONEY! I NEED THIS IN MY LIFE!" Didn't want this one to languish in the stash for a few years, so sewing it up was priority number 1. One needs all the green or red garments they can get for Christmas season theme dressing. Aka the best season of the year because everyone wears my favorite colors.
For once my existing pattern stash was rummaged through for a suitable pattern. Memory fails me but I think I bought Simplicity 1207 on a whim during one of my random Etsy pattern browsing bindges. Nothing de-stresses me like staring at new patterns.  That shoulder detail intrigued was very intriguing. I didn't realize it was a pocket until looking at the pattern pieces.  Sure the lady on the left has a handkerchief in hers but sometimes I'm oblivious. Probably distracted by the shoes the lady in red has on. Would buy! **Can I get Royal Vintage shoes on the phone and make this happen?  Also if you're wondering why the pattern number is different on this picture it's because Simplicity re-released the pattern about a month after I completed my jacket.  I haven't bought the new version check if the patterns have been tweaked to make them easier to sew.  Even so it is nice to be able say, "If you want to make this pattern you can easily get a copy."
Anyway, back to the yoke detail! Sewing it together was one of the most interesting construction processes I've had in awhile. It's a good thing I did have the original instructions to refer to because it still made me go......huh? Here's a photo I took mid sewing process to document the yoke area. What you see here is the back on the left with the yoke/back half of the pocket bag attached at the shoulders. On the right is the front with the back yoke area attached. The fronts have the other half of the pocket bag sewn in already. They're in lining fabric and you top-stitch the edge of the pocket before getting to this point.
To put these two pieces together press the seam allowance under on the "band" portion of the front. Then you lay it on top of the back and top-stitch everything into place. Pretty sure the pattern drafter wasn't thinking, "And maybe some crazy person will do this on plaid. That will be fun!" He was probably thinking the opposite. Of course I was that crazy person and was already past the point of no return.  Time for a walking foot, lots of pins and maybe a burnt sacrifice to the sewing goddess.  Though I like to think of her as a cousin of Jobu from "Major League" and she really just wants some alcohol. P.S. "Jesus, I like him very much, but he no help with curve ball."
As you can kind of see in this poorly lit photo, it worked! Bless whichever relative gave me the anal retentive fabric cutting genes.  All....The...Plaids....WILL...Match. Then months later you can smile smugly into your camera about how awesome your yoke plaids match.

The other detail to talk about is the buttons. You might have noticed that my version has 2 instead of 1 like on the pattern illustration.  Well when I muslined this up it seemed like the button was way too low to keep all of the jacket in place. The upper portion was gaping a bit in a non flattering way.  If I had to guess my low bust point might be to blame. Lurking down low and pushing everything about with abandon. Solution, more buttons!  I added another button 4.5" above the original button location. After wearing the jacket once I also added a snap to keep the bottom half in place. Gotta keep all those plaid lines in place.


Pattern
Simplicity 1207.  Since making my version this pattern was re-released by the company as Simplicity 8461.

Fabrics used
Wool plaid from Mood fabrics, black bemberg from Emmaonesock

Pattern changes/alterations
1. Graded pattern up from 34" bust to 36" bust.
2. Added 1/2" ease to the waist and hip.
3. 1/2 forward shoulder adjustment.
4. Added another button to the CF.

Confessions/Advice
The plaid matching might be on point, but on the other end of the spectrum we have the back of this jacket.  I had no idea this suit was so puffy there until taking these photos. Checked the pattern and yes I did neglect to put in my normal sway back adjustment.  Oops.  At least I've got plenty of ease to move around.


Husband Comment
"It has a lot of real estate for pins. Also the pattern illustration looks like an air hostess. Not you though."

My Final Thoughts
One good thing about blogging months after completing a project is that you know how successful of a wardrobe item it is.  I wore this one as often as possible from December to April. In fact I was always pissed if I'd worn it to church last week and didn't want to repeat my outfit.  I will admit that the color had a lot to do with that.  Pros for the actual design is that it's very comfortable and warm thanks to the wool and full lining. I do like the pocket yoke detail and it makes me think I need to pick up a pair of dress clips.  Simplicity 1207 isn't a pattern that I'm planning on sewing again, but I'm 100% happy that I did make one up.
During the summer of 2017 I made two other jackets, one successful, one that's a bit of a mess. It may be salvageable if I rip out the lining and maybe replace a collar.  Of course I hate taking apart finished garments so that one may never see the light of day. You'll definitely see the one that worked out even though it's a pattern repeat. Until then buy plaid and cake. I already am.

* Don't know how prevalent the Fashion Bug chain was but it was slightly better quality than Walmart but not as good as Macy's. Anyway the price was right so my Mom let us do a lot of our High School wardrobe shopping there.

** I happen to wearing the Royal Vintage Marilyn pumps in these photos and I'd give them a thumbs up.
Proudly designed by Mlekoshi pixel perfect web designs